


Projen Taiwan
CAK0008T CALIBRE Bushing Tool For Tesla Model 3 Electric Motor
CAK0008T CALIBRE Bushing Tool For Tesla Model 3 Electric Motor
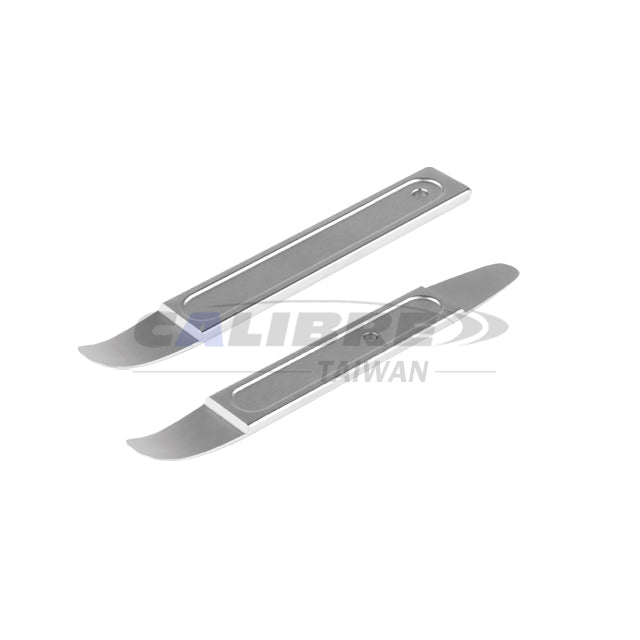
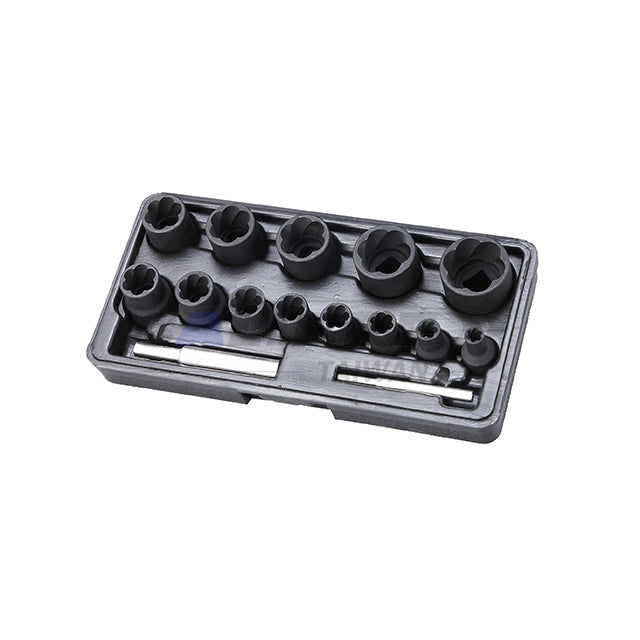
Bushing tool kit
Bushing tool kit (CAK0008T) simplifies Tesla Model 3 front motor maintenance. First, align the specialized black sleeve with the housing. Furthermore, ensure the side cutout matches the motor's unique profile. Consequently, you can apply pressure to remove the old bushing. Similarly, use the same procedure to install a new one. Therefore, this precise fit prevents component damage. Ultimately, it provides an efficient solution for electric motor bushing replacement.
Manual
Feature:
- Tool to remove an old bushing or install a new bushing on Tesla Model 3 electric motor (only for front electric motor)
- The black sleeve with a special side cutout specifically design for Tesla Model 3 (see arrow in the image on the right)
- 1Set/White Box
- 8Set/16.4/17.4kgs/1.34'
WHERE TO USE:
- Tool to remove an old bushing or install a new bushing on Tesla Model 3 electric motor (only for front electric motor).
- The black sleeve with a special side cutout specifically design for Tesla Model 3 (see arrow in the image on the right)

SPECIFICATIONS:


REMOVE AN OLD BUSHING
- Locate the bushing house (Fig. 1)
- Install the receiving sleeve on the spindle and the fixing nut.
- Insert the spindle and receiving sleeve through the central
hole on the bushing (Fig. 2) - On the other side of the bushing, insert the pushing sleeve
through the spindle. - Screw in the turning nut on the spindle until the nut
reaches the pushing sleeve. - Make sure that all the tool parts are aligned with the
bushing central line (as the dotted line shows on Fig 3)
Use two 27 mm spanners. One to hold on the fixing nut,
and another one for turning (Fig. 3). - Turn the nut clockwise and the pushing sleeve will
gradually push the old bushing out of the bushing housing.

INSTALL A NEW BUSHING
- Install the receiving sleeve on the spindle and the fixing nut.
- Insert the spindle and receiving soleve through the central hole on the bushing (Fig. 2).
- On the other side of the bushing, insert a new bushing and the pushing sleeve through the spindle.
- Screw in the turning nut on the spindle until the nut reaches the pushing sleeve.
- Make sure that all the tool parts are aligned with the bushing central line.
- Use two 27 mm spanners. One to hold on the fixing nut, and another one for turning.
- Turn the nut clockwise and the pushing sleeve will gradually push the new bushing into the bushing housing.
Couldn't load pickup availability


We are also good at
-
New Arrival
Discover top-rated automotive tools and mechanics tools at Projen Tools. The best...
-

Automotive Tools
high-quality auto repair tools with competitive factory-direct pricing. Custom branding available. Your...
-
General Tools
Auto tools, specifically general tools, are essential for performing a wide range...